
Australian A-League Men

Brisbane Roar
LWLLL
1-1
Finished
Wellington Phoenix FC
LDWDW
Friday, February 2 at 08:45 AMSuncorp Stadium
Summary
First half
- ⇅Ayom Majok on, Henry Hore off (injury)38'
- ⇅Corey Brown on, Jack Hingert off (injury)41'
Second half
- Yellow card for James Nikolovski59'
- ⇅Carlo Armiento on, Thomas Waddingham off62'
- ⇅Marco Rojas on, Joe Caletti off62'
- 64'Yellow card for Nicholas Pennington
- 69'⇅Oskar Zawada on, Oskar van Hattum off
- 70'⇅Fin Conchie on, David Ball off
- 74'⇅Ben Old on, Mohamed Al-Taay off
- ⇅Louis Zabala on, Nikola Mileusnic off79'
- ⇅Taras Gomulka on, Antonee Burke-Gilroy off79'
- 89'Yellow card for Bozhidar Kraev
- 89'⇅Fergus Gillion on, Bozhidar Kraev off
- Yellow card for Louis Zabala90'+1'
Statistics
53%Possession47%
21Shots9
4Shots on target6
6Corners0
8Fouls9
2Yellow cards2
0Red cards0
1Offsides1
5Saves3
590Accurate passes517
634Total passes574
Commentary
Match ends, Brisbane Roar 1, Wellington Phoenix 1.Show full commentary
- Match ends, Brisbane Roar 1, Wellington Phoenix 1.
- 90'+8'Second Half ends, Brisbane Roar 1, Wellington Phoenix 1.
- 90'+6'Corner, Brisbane Roar. Conceded by Scott Wootton.
- 90'+6'Attempt blocked. Ayom Majok (Brisbane Roar) right footed shot from the right side of the box is blocked. Assisted by Jay O'Shea with a through ball.
- 90'+4'Goal! Brisbane Roar 1, Wellington Phoenix 1. Corey Brown (Brisbane Roar) header from very close range to the centre of the goal. Assisted by Keegan Jelacic.
- 90'+1'Louis Zabala (Brisbane Roar) is shown the yellow card for a bad foul.
- 90'+1'Foul by Louis Zabala (Brisbane Roar).
- 90'+1'Ben Old (Wellington Phoenix) wins a free kick in the defensive half.
- 89'Substitution, Wellington Phoenix. Fergus Gillion replaces Bozhidar Kraev.
- 89'Bozhidar Kraev (Wellington Phoenix) is shown the yellow card.
- 87'Attempt blocked. Carlo Armiento (Brisbane Roar) left footed shot from the centre of the box is blocked. Assisted by Jay O'Shea.
- 85'Attempt saved. Kosta Barbarouses (Wellington Phoenix) right footed shot from a difficult angle on the left is saved in the centre of the goal. Assisted by Ben Old.
- 85'Attempt missed. Ayom Majok (Brisbane Roar) right footed shot from outside the box is high and wide to the right. Assisted by Jay O'Shea.
- 83'Delay over. They are ready to continue.
- 82'Delay in match because of an injury Isaac Hughes (Wellington Phoenix).
- 81'Attempt missed. Carlo Armiento (Brisbane Roar) left footed shot from outside the box is high and wide to the left. Assisted by Marco Rojas.
- 81'Attempt blocked. Carlo Armiento (Brisbane Roar) left footed shot from the centre of the box is blocked. Assisted by Taras Gomulka.
- 80'Attempt blocked. Carlo Armiento (Brisbane Roar) left footed shot from outside the box is blocked. Assisted by Corey Brown.
- 80'Attempt blocked. Jay O'Shea (Brisbane Roar) right footed shot from outside the box is blocked.
- 80'Attempt blocked. Carlo Armiento (Brisbane Roar) right footed shot from the left side of the box is blocked. Assisted by Corey Brown.
- 79'Substitution, Brisbane Roar. Taras Gomulka replaces Antonee Burke-Gilroy.
- 79'Substitution, Brisbane Roar. Louis Zabala replaces Nikola Mileusnic.
- 77'Corner, Brisbane Roar. Conceded by Lukas Kelly-Heald.
- 76'Offside, Wellington Phoenix. Kosta Barbarouses is caught offside.
- 74'Substitution, Wellington Phoenix. Ben Old replaces Mohamed Al-Taay.
- 73'Lukas Kelly-Heald (Wellington Phoenix) wins a free kick in the defensive half.
- 73'Foul by Nikola Mileusnic (Brisbane Roar).
- 73'Attempt saved. Carlo Armiento (Brisbane Roar) left footed shot from outside the box is saved in the centre of the goal. Assisted by Keegan Jelacic.
- 72'Foul by Lukas Kelly-Heald (Wellington Phoenix).
- 72'Antonee Burke-Gilroy (Brisbane Roar) wins a free kick in the defensive half.
- 71'Offside, Brisbane Roar. Corey Brown is caught offside.
- 71'Corner, Brisbane Roar. Conceded by Nicholas Pennington.
- 70'Substitution, Wellington Phoenix. Fin Conchie replaces David Ball.
- 69'Substitution, Wellington Phoenix. Oskar Zawada replaces Oskar van Hattum.
- 67'Corner, Brisbane Roar. Conceded by Alex Paulsen.
- 67'Attempt saved. Carlo Armiento (Brisbane Roar) left footed shot from outside the box is saved in the bottom right corner. Assisted by Antonee Burke-Gilroy.
- 66'Hand ball by Kosta Barbarouses (Wellington Phoenix).
- 66'Delay over. They are ready to continue.
- 65'Delay in match because of an injury Oskar van Hattum (Wellington Phoenix).
- 65'Attempt blocked. Keegan Jelacic (Brisbane Roar) left footed shot from the centre of the box is blocked.
- 64'Nicholas Pennington (Wellington Phoenix) is shown the yellow card for a bad foul.
- 64'Marco Rojas (Brisbane Roar) wins a free kick in the attacking half.
- 64'Foul by Nicholas Pennington (Wellington Phoenix).
- 64'Foul by Keegan Jelacic (Brisbane Roar).
- 64'Bozhidar Kraev (Wellington Phoenix) wins a free kick in the defensive half.
- 62'Substitution, Brisbane Roar. Marco Rojas replaces Joe Caletti.
- 62'Substitution, Brisbane Roar. Carlo Armiento replaces Thomas Waddingham.
- 61'Lukas Kelly-Heald (Wellington Phoenix) wins a free kick in the defensive half.
- 61'Foul by Thomas Waddingham (Brisbane Roar).
- 59'James Nikolovski (Brisbane Roar) is shown the yellow card for a bad foul.
- 58'Kosta Barbarouses (Wellington Phoenix) wins a free kick on the left wing.
- 58'Foul by James Nikolovski (Brisbane Roar).
- 57'Nicholas Pennington (Wellington Phoenix) wins a free kick in the defensive half.
- 57'Foul by Keegan Jelacic (Brisbane Roar).
- 57'Nikola Mileusnic (Brisbane Roar) wins a free kick in the defensive half.
- 57'Foul by Mohamed Al-Taay (Wellington Phoenix).
- 54'Attempt missed. Bozhidar Kraev (Wellington Phoenix) right footed shot from outside the box is close, but misses to the left. Assisted by Lukas Kelly-Heald.
- 51'Goal! Brisbane Roar 0, Wellington Phoenix 1. Bozhidar Kraev (Wellington Phoenix) header from very close range to the centre of the goal. Assisted by Mohamed Al-Taay with a cross.
- 50'Attempt missed. Corey Brown (Brisbane Roar) left footed shot from outside the box misses to the right. Assisted by Kai Trewin following a corner.
- 50'Attempt blocked. Ayom Majok (Brisbane Roar) left footed shot from the centre of the box is blocked. Assisted by Thomas Waddingham.
- 49'Corner, Brisbane Roar. Conceded by Lukas Kelly-Heald.
- 49'Attempt blocked. Nikola Mileusnic (Brisbane Roar) with an attempt from the right side of the six yard box is blocked. Assisted by Corey Brown with a cross.
- 48'Foul by Bozhidar Kraev (Wellington Phoenix).
- 48'Antonee Burke-Gilroy (Brisbane Roar) wins a free kick on the right wing.
- 45'Second Half begins Brisbane Roar 0, Wellington Phoenix 0.
- 45'+6'First Half ends, Brisbane Roar 0, Wellington Phoenix 0.
- 45'+5'Foul by Mohamed Al-Taay (Wellington Phoenix).
- 45'+5'Ayom Majok (Brisbane Roar) wins a free kick in the attacking half.
- 45'+5'Attempt saved. Kosta Barbarouses (Wellington Phoenix) right footed shot from the centre of the box is saved in the centre of the goal. Assisted by Oskar van Hattum.
- 45'+3'Attempt missed. Keegan Jelacic (Brisbane Roar) right footed shot from outside the box is high and wide to the right following a fast break.
- 45'+1'Attempt saved. Nicholas Pennington (Wellington Phoenix) right footed shot from the right side of the box is saved in the bottom right corner. Assisted by David Ball.
- 45'Attempt saved. Oskar van Hattum (Wellington Phoenix) left footed shot from the centre of the box is saved in the centre of the goal. Assisted by Bozhidar Kraev.
- 43'Attempt saved. Kosta Barbarouses (Wellington Phoenix) right footed shot from more than 35 yards is saved in the bottom right corner.
- 41'Substitution, Brisbane Roar. Corey Brown replaces Jack Hingert because of an injury.
- 41'Delay over. They are ready to continue.
- 39'Delay in match because of an injury Lukas Kelly-Heald (Wellington Phoenix).
- 39'Delay in match because of an injury Jack Hingert (Brisbane Roar).
- 38'Jack Hingert (Brisbane Roar) wins a free kick in the defensive half.
- 38'Foul by Lukas Kelly-Heald (Wellington Phoenix).
- 38'Substitution, Brisbane Roar. Ayom Majok replaces Henry Hore because of an injury.
- 38'Delay over. They are ready to continue.
- 36'Delay in match because of an injury Henry Hore (Brisbane Roar).
- 34'Nicholas Pennington (Wellington Phoenix) wins a free kick on the right wing.
- 34'Foul by Keegan Jelacic (Brisbane Roar).
- 33'Attempt missed. Mohamed Al-Taay (Wellington Phoenix) left footed shot from outside the box is high and wide to the left.
- 30'Attempt missed. Nikola Mileusnic (Brisbane Roar) left footed shot from the centre of the box is high and wide to the left. Assisted by Henry Hore with a cross.
- 23'Attempt saved. Henry Hore (Brisbane Roar) right footed shot from outside the box is saved in the centre of the goal. Assisted by Keegan Jelacic.
- 22'Attempt blocked. Thomas Waddingham (Brisbane Roar) left footed shot from outside the box is blocked. Assisted by Keegan Jelacic.
- 16'Henry Hore (Brisbane Roar) wins a free kick in the defensive half.
- 16'Foul by Nicholas Pennington (Wellington Phoenix).
- 14'Corner, Brisbane Roar. Conceded by Mohamed Al-Taay.
- 11'Attempt missed. Oskar van Hattum (Wellington Phoenix) header from the centre of the box misses to the right. Assisted by Bozhidar Kraev with a through ball.
- 10'Attempt missed. Jay O'Shea (Brisbane Roar) right footed shot from outside the box is too high. Assisted by Joe Caletti.
- 9'Henry Hore (Brisbane Roar) wins a free kick in the defensive half.
- 9'Foul by Mohamed Al-Taay (Wellington Phoenix).
- 4'Mohamed Al-Taay (Wellington Phoenix) wins a free kick on the right wing.
- 4'Foul by Antonee Burke-Gilroy (Brisbane Roar).
- 3'Attempt missed. Keegan Jelacic (Brisbane Roar) right footed shot from outside the box is high and wide to the right. Assisted by Jay O'Shea.
- First Half begins.
- Lineups are announced and players are warming up.
Momentum
BrisbaneWellington
153045607590
Top performers
Brisbane
- Carlo ArmientoShots7
- Macklin FrekeSaves5
Wellington
- Kosta BarbarousesShots3
- Scott WoottonSaves4
Line-ups
Brisbane4-4-25-4-1Wellington
 40Paulsen
 18Kelly-Heald
26Hughes
4Wootton
12Al-Taay
 3Surman
⚽11Kraev
10Ball
 24Hattum
 15Pennington
7Barbarouses
23Jelacic
 16Waddingham
26O'Shea
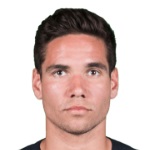 13Hore
 6Caletti
 10Mileusnic
21Burke-Gilroy
27Trewin
 19Hingert
 32Nikolovski
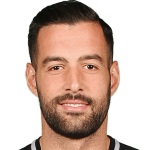 1Freke
Brisbane
- 1Macklin FrekeG
- 27Kai TrewinCD-L
- 32James NikolovskiCD-R
- 21Antonee Burke-GilroyLB
- 19Jack HingertRB
- 26Jay O'SheaCM-L
- 6Joe CalettiCM-R
- 13Henry HoreLM
- 10Nikola MileusnicRM
- 23Keegan JelacicCF-L
- 16Thomas WaddinghamCF-R
Wellington
- 40Alex PaulsenG
- 4Scott WoottonCD
- 26Isaac HughesCD-L
- 3Finn SurmanCD-R
- 18Lukas Kelly-HealdLB
- 12Mohamed Al-TaayRB
- 11Bozhidar KraevCM-L
- 15Nicholas PenningtonCM-R
- 10David BallLM
- 24Oskar van HattumRM
- 7Kosta BarbarousesF
Head to head
- Nov 04, 23Wellington Phoenix FC5-2Brisbane Roar
- Apr 16, 23Wellington Phoenix FC2-2Brisbane Roar
- Jan 14, 23Brisbane Roar0-1Wellington Phoenix FC
- Mar 30, 22Brisbane Roar0-3Wellington Phoenix FC
- Mar 12, 22Brisbane Roar2-1Wellington Phoenix FC